Posts

Showing posts from 2010

Shopping Assistant App Released - 15 Downloads in First Day

Image
Yesterday I decided I wanted to get at least something out on the Android Market. So I put together a very very simple app called Shopping Assistant. Currently its only function is to help you figure out cost per ounce while you are out shopping. This is helpful for knowing if something is really a good deal or not. Shopping Assistant is a simple app, but in the first day there were 15 downloads. The app is currently free. Perhaps someday I will add more features. The ADT Plugin for  Eclipse made it very easy to export the app, sign it and get it ready for upload to the Android Market . I used the Dalvic Debug Monitor to take the screenshots. You can find Shopping Assistant in the Android Market.
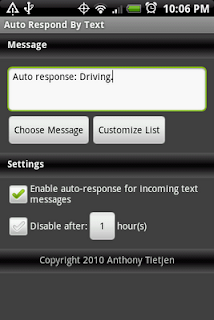
Auto Respond By Text App Hits 55 Downloads

I listed my Android app "Auto Respond By Text" on  GetJar.com and it went active on October 14th. Two days later when I checked at about 5:05 PM it was showing that there were 18 downloads. Now, 16 days later, there have been 55 downloads. I may have contributed to one (if any) of the downloads. Because "Auto Respond By Text"  was made using App Inventor for Android, it isn't setup correctly to be able to publish via the Android Marketplace. When I tried to upload it to the Android Marketplace I got an error about the icon. So, as an alternative I have listed it on GetJar.com. Download Auto Respond By Text

File Size and Startup Time Comparison of Android Apps

Image
I noticed that the apps I was making using App Inventor for Android were ending up being about 4MB in file size. So I decided to find out what size an app is when you use the Android SDK instead. It turns out that there is a considerable difference. A simple Hello World app made using the SDK is only 20KB, whereas one made using App Inventor for Android is 3.55 Mb. I also found out that the startup time for the two Hello World apps differed. On my phone, the app made using the SDK opened maybe 1 1/2 seconds faster than the one made using App Inventor for Android. See below for more details. Made with Android SDK File size: 20.00KB Startup: Maybe less than a second Made with App Inventor for Android File size: 3.55MB Startup: About 2 seconds

Parameters Sent by TinyWebDB in App Inventor for Android

TinyWebDB is a component in App Inventor for Android that lets your app communicate with a web page in order to set or retrieve values, rather than storing them on the phone itself. I wanted to know what the TinyWebDB component sends to the web page when it tries to set or retrieve values, so I used Kodingen this morning to write a PHP script that takes the form fields and values sent to the page and writes them to a file. Here is what I found: TinyWebDB.StoreValue sends these parameters: tag value TinyWebDB. GetValue sends this parameter: tag So if you write your own PHP page for TinyWebDB to connect to, you can know if TinyWebDB is trying to store a value if the "value" key exists in the $_POST array. If the "value" key doesn't exist in the $_POST array then you know that TinyWebDB is only trying to retrieve the value for the given tag. As an alternative to using the method outlined by Google , you could use TinyWebDB with your own script written in an

Auto Respond By Text - App for Android

Image
"Auto Respond By Text" is an Android app I made by using App Inventor for Android . This app is a tool that will send an automatic response to whoever who sends you a text while it is enabled. It was inspired by Google's example app called " No Text While Driving ". After seeing that idea, I made mine from scratch and I added much enhancement. Here is what mine offers beyond the example provided by Google: Choose from a list of pre-defined responses. Customize your own list of responses. Enable or disable the auto-response feature. Set a timeout so that it will disable itself automatically after a customizable period of time. Sleek user interface. Thanks goes out to MakeUseOf.com for helping me figure out how to take screenshots of Android apps without having to root the phone. Download Now

Auto Respond By Text - App for Android

Image
"Auto Respond By Text" is another Android app I made by using App Inventor for Android . This app is a tool that will send an automatic response to whoever who sends you a text while it is enabled. It was inspired by Google's example app called " No Text While Driving ". But after seeing that idea, I made mine from scratch and I added much enhancement. Here is what mine offers beyond the example provided by Google: Choose from a list of pre-defined responses. Customize your own list of responses. Enable or disable the auto-response feature. Set a timeout so that it will disable itself automatically after a customizable period of time. Sleek user interface. Download Now

App Inventor Beta

Image
I bult a Tic-Tac-Toe game for Android phones tonight using App Inventor . I didn't have to write a single line of code  but I was still able to use logic such as whether to show an X or an O based on whose turn it is. I also included a reset button that clears out all the X's and O's when clicked. As I mentioned, I didn't write a single line of code. To build the layout, you just drag and drop components on the visual editor. Then when you want to handle events (such as a button click) you drag and drop events onto the "Block Editor". The Block Editor is also used for creating variables, if statements, etc. There are three main parts of App Inventor: App Inventor Extras: A program you can install on your computer to allow for viewing the app faster on your phone. (This isn't required if you are willing to download the app and install it over and over again to see what it looks like.) The Visual Editor: A website you load in your browser. The Bl

Tic Tac Toe - Using App Inventor Beta

Image
I bult a Tic-Tac-Toe game for Android phones tonight using App Inventor. I didn't have to write a single line of code but I was still able to use logic such as whether to show an X or an O based on whose turn it is. I also included a reset button that clears out all the X's and O's when clicked. As I mentioned, I didn't write a single line of code. To build the layout, you just drag and drop components on the visual editor. Then when you want to handle events (such as a button click) you drag and drop events onto the "Block Editor". The Block Editor is also used for creating variables, if statements, etc. There are three main parts of App Inventor: App Inventor Extras : A program you can install on your computer to allow for viewing the app faster on your phone. (This isn't required if you are willing to download the app and install it over and over again to see what it looks like.) The Visual Editor : A website you load in your browser. The Block Ed

Add and Edit WordPress Posts From Your Android Phone

I went to my wordpress site today using my phone. The site displayed using the mobile theme and I noticed a link at the bottom to "Download WordPress for Android". I installed the app and here I am using it to write this post. Not only can you modify posts but you can modify pages as well. It supports basic formatting such as bold, italics, underline, link, and block-quote. Tags are also supported. I am impressed that it also goes above and beyond the basics by allowing you to upload media files, add categories, and view stats complete with a visial graph. Watch a video and find the link to the application at http://android.wordpress.org/

Error when using ScrollView in Android

If you have added a ScrollView to your layout in Android, you might get this error showing up in your IDE: error: Error parsing XML: unbound prefix The problem is likely that you have not provided the xmlns:android attribute. If you have placed your ScrollView around the default LinearLayout in the project, just move the xmlns:android attribute from the LinearLayout to the ScrollView that you added. (The source for the error above came from Eclipse 3.6.0 when I hovered over the error icon to the left of the ScrollView tag in my main.XML file.) Also thanks to Lars Vogel's tutorial for showing me where to place the ScrollView.